Table of Contents
- Introduction
- Step 1: Prepare the Anchoring System
- Step 2: Fluff and Prepare the Wreath
- Step 3: Secure the Wreath to the Anchor
- Step 4: Manage the Power Cord
- Step 5: Final Adjustments and Finishing Touches
- FAQ
- Conclusion
Introduction
Hanging a wreath on a brick wall can be a challenging task, but with the right tools and techniques, it can be done with ease. In this comprehensive guide, we’ll walk you through the step-by-step process of hanging a wreath on a brick wall, ensuring that your holiday display looks professional and secure.
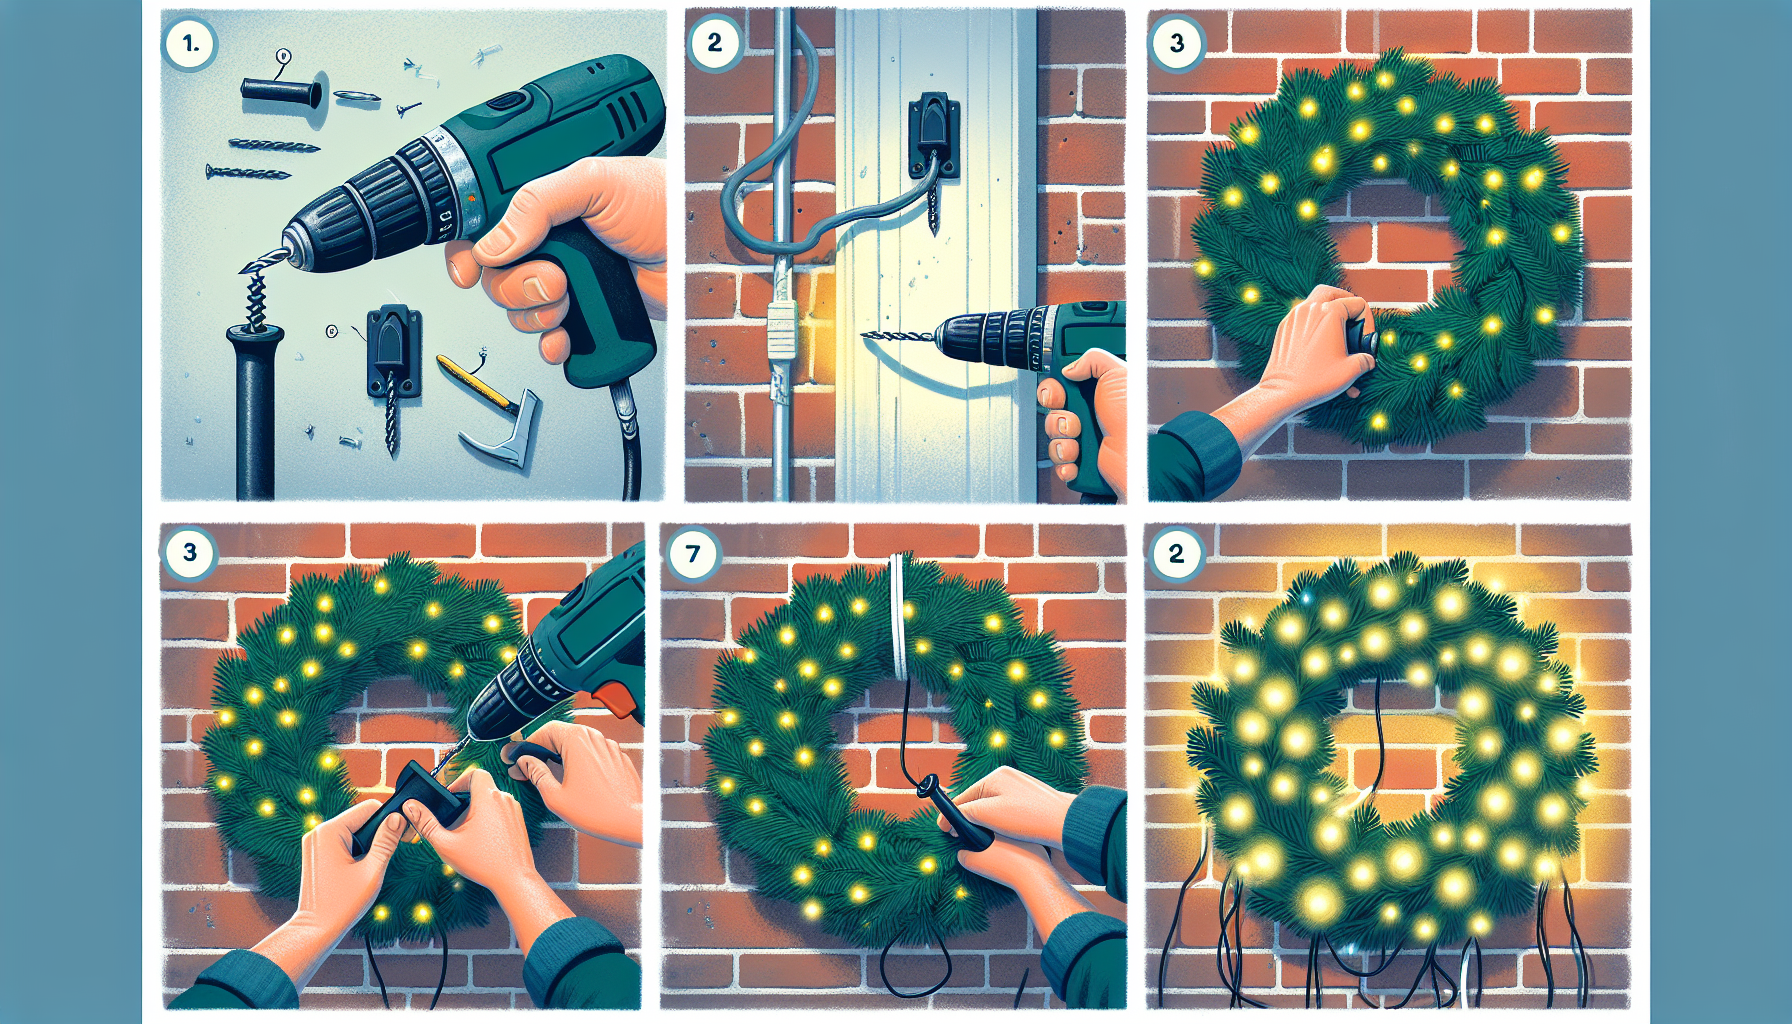
Step 1: Prepare the Anchoring System
The first step in hanging a wreath on a brick wall is to create a secure anchoring system. This involves drilling a hole in the brick and installing a plastic anchor that can support the weight of the wreath.
Start by using a hammer drill to create a hole in the grout line, approximately 1.5 inches deep. Next, insert a plastic anchor into the hole, making sure it is firmly in place. This anchor will provide a sturdy foundation for the wreath.
Step 2: Fluff and Prepare the Wreath
Before hanging the wreath, it’s important to fluff it out to give it a full, professional appearance. Take the time to gently separate the branches and adjust the shape of the wreath until it looks its best.
Once the wreath is fluffed, locate the power cord and determine where you want the plug to be positioned. This will help you plan the best way to route the cord and keep it out of sight.
Step 3: Secure the Wreath to the Anchor
Now it’s time to hang the wreath. Start by tying a piece of wire around the wreath, creating a loop that can be hooked over the anchor. Make sure the wire is securely fastened and can support the weight of the wreath.
Next, carefully position the wreath over the anchor and gently lower it into place. Adjust the wire as needed to ensure the wreath is centered and level.
Step 4: Manage the Power Cord
With the wreath securely in place, it’s time to address the power cord. Measure the length of cord needed to reach the nearest power source and cut it to size. Attach a male plug to the end of the cord and plug it in.
To keep the cord tidy and prevent it from blowing in the wind, use hot glue to secure it to the brick or surrounding surfaces. Apply small dabs of glue every foot or so, taking care not to use too much as it can leave residue.
Step 5: Final Adjustments and Finishing Touches
Take a step back and inspect your work. Make any final adjustments to the wreath, ensuring it is centered, level, and securely in place. If the cord is still visible, consider using additional hot glue or other decorative elements to conceal it.
Once you’re satisfied with the final result, turn on the wreath’s lights and enjoy your handiwork!
FAQ
Can I hang a wreath on a brick wall without drilling?
While it is possible to hang a wreath on a brick wall without drilling, it is not recommended as the wreath may not be secure and could blow away in windy conditions. Drilling a hole and using a plastic anchor is the best way to ensure a sturdy and long-lasting installation.
How much weight can the plastic anchor support?
The plastic anchors typically used for hanging wreaths on brick walls can support up to 50 pounds of weight. This should be more than sufficient for most standard-sized wreaths.
Can I use a regular drill instead of a hammer drill?
While a regular drill may work for drilling the initial hole, a hammer drill is recommended as it will create a cleaner, more secure hole in the brick. The hammering action of the hammer drill helps to break through the brick material more effectively.
How do I remove the wreath and anchor when the holidays are over?
To remove the wreath and anchor, simply unscrew the anchor from the wall and pull it out. If there is any residue from the hot glue used to secure the power cord, you can use a wire brush or denatured alcohol to help remove it.
Can I use the same anchor and hole for multiple years?
Yes, you can reuse the same anchor and hole for multiple years. As long as the anchor is still securely in place, you can simply rehang your wreath using the existing hardware.
Conclusion
Hanging a wreath on a brick wall may seem daunting, but with the right tools and techniques, it can be a straightforward and rewarding process. By following the steps outlined in this guide, you can create a beautiful and long-lasting holiday display that will impress your guests and neighbors. Happy decorating!